How to Change Table View?
The following also applies for Rooms, Users and Tenants (not just Plugs)
How to Remove Headers
To remove any of the headers in the overview, click “Change View” labelled as 3.
The pop-up shown on the left will be displayed on your screen:
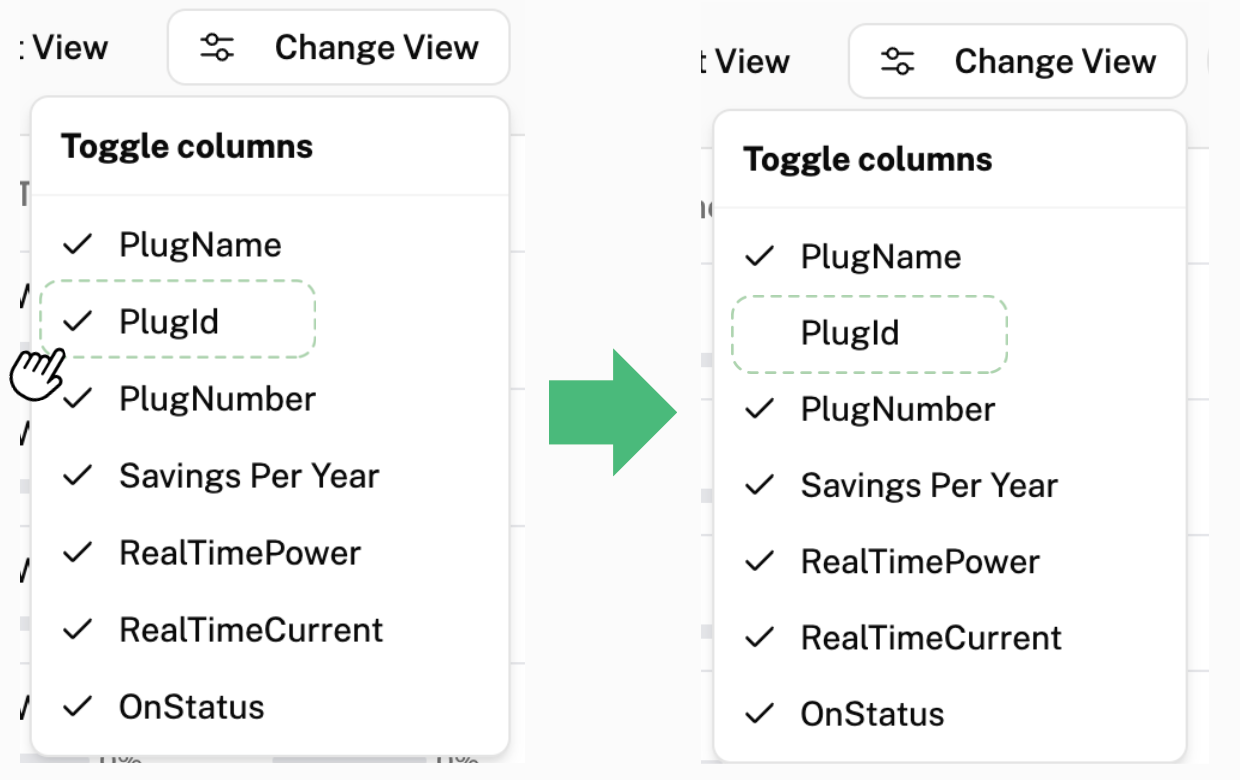
For example, to remove Plug ID, click on “Plug ID”. The tick next to “Plug ID” will disappear.
The header “Plug ID” will no longer be displayed in the plug overview as shown below.

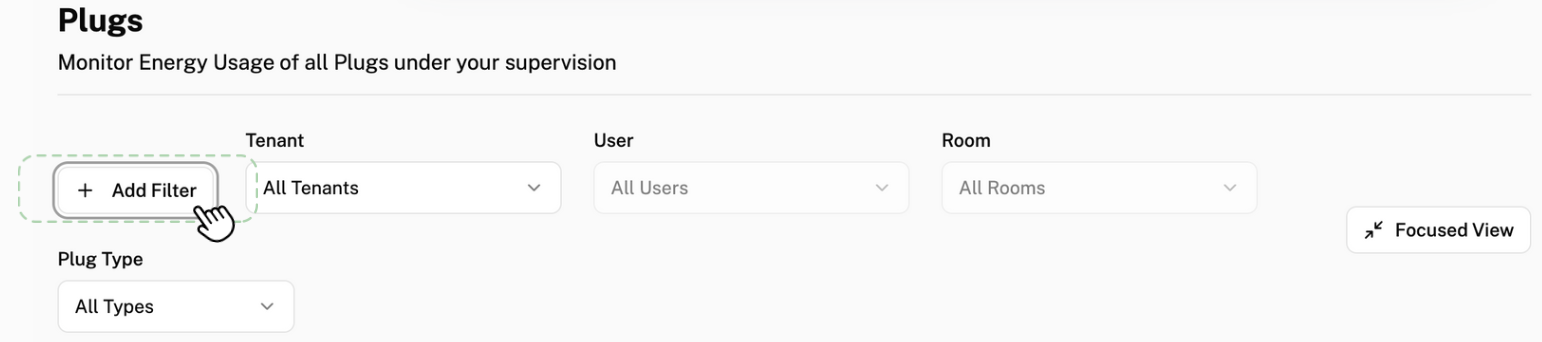
How to Add Filters
To add filters to the table, click “Add Filter”.
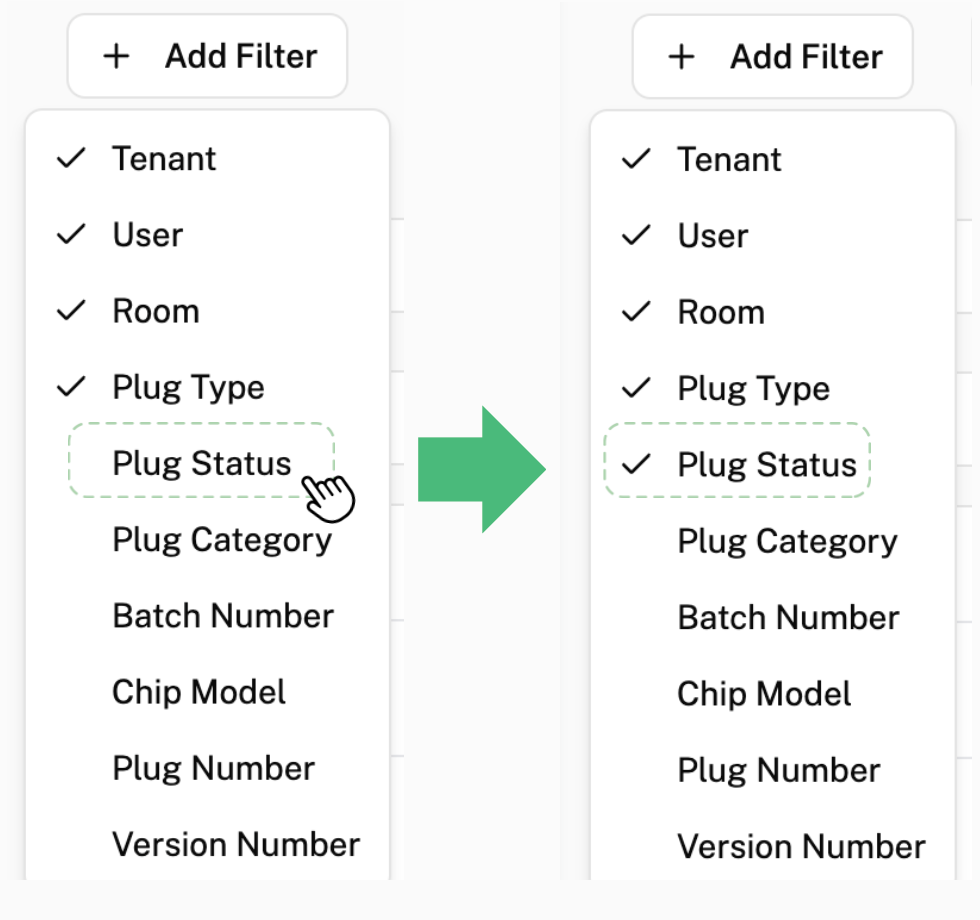
Here, you can choose to sort your table according to the categories in the pop that will be displayed after clicking “Add Filter”.
For example, to sort the plugs based on their plug status, click “Plug Status”. If successful, a tick should appear next to “Plug Status” as shown on the left.
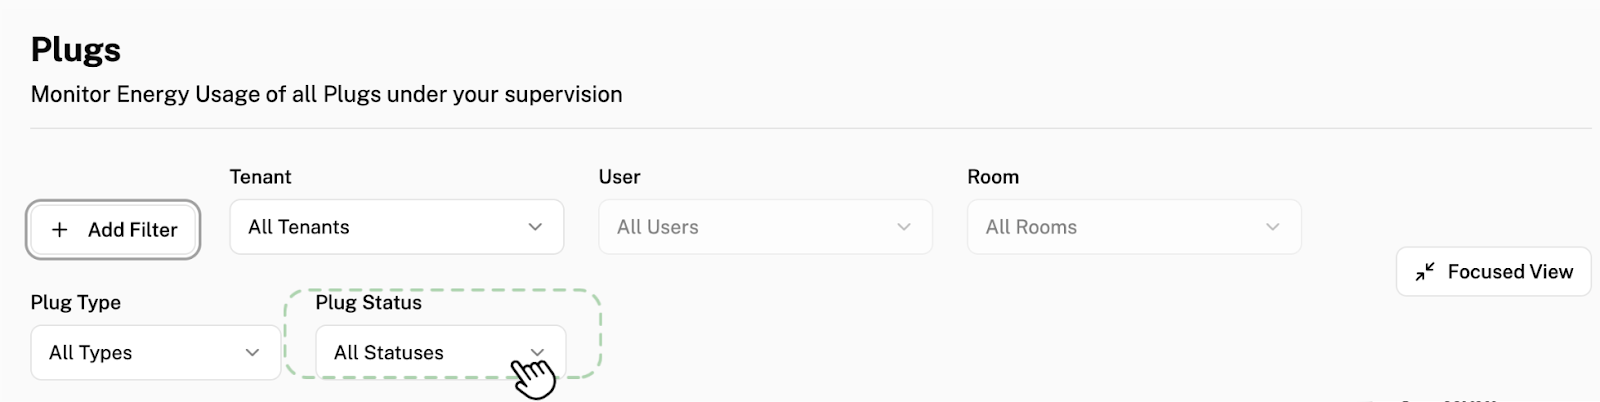
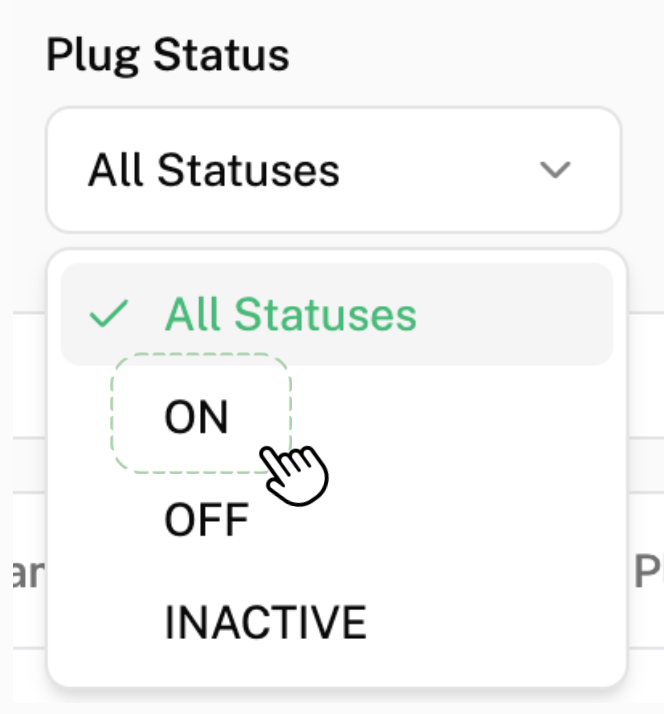
The filter “Plug Status” will show up above your table. To only view plugs that are “ON”, click “All Statuses”.
Then click on “ON”.
This filter will then be applied, and only the plugs that are “ON” will be shown in the table below.
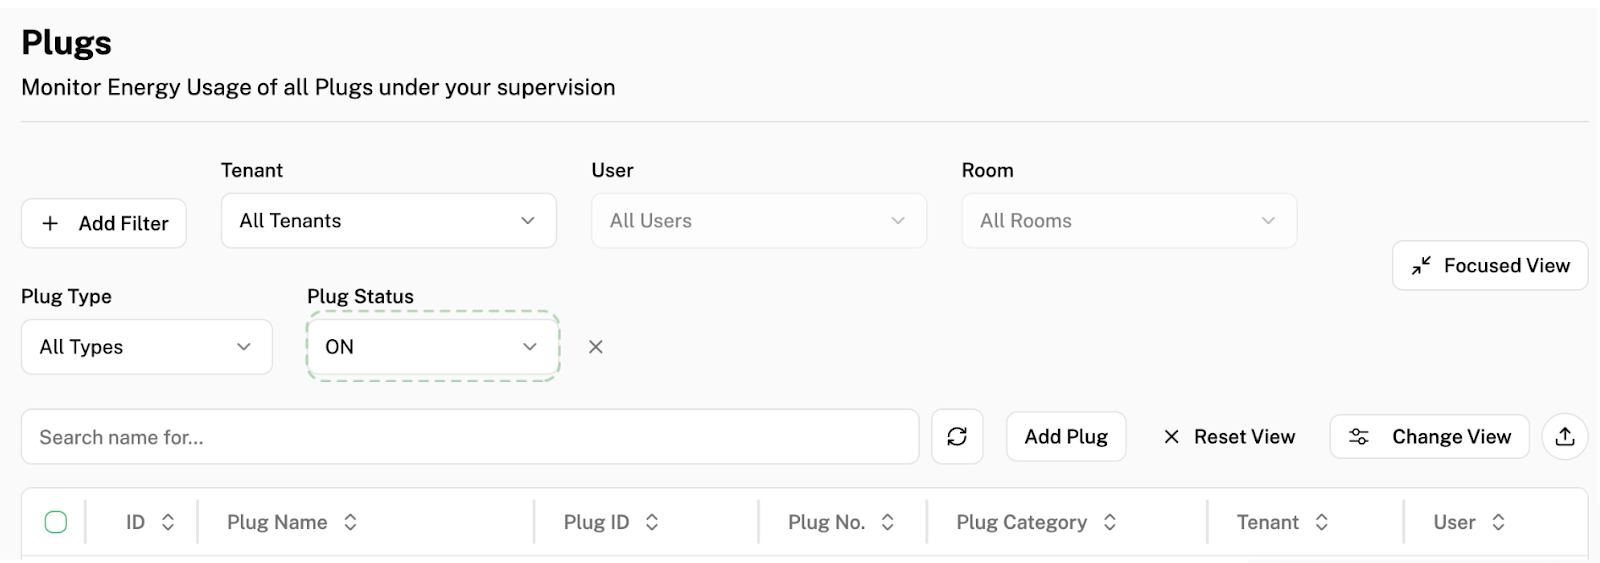
The filters applied will remain the same even after leaving and returning back to the page.
What to Do if Errors in Filtering Occur
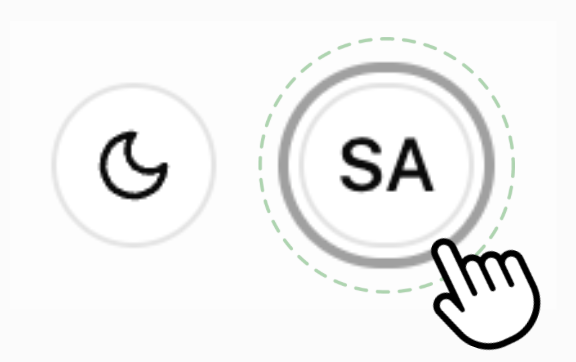
In the case where it seems like there is no filter being applied on the front-end (Above the table there is no visible filter being applied), but on the back-end, there is actually a filter being applied, (When you see the plugs in the table, a filter is being applied) find the circular icon next to the crescent moon icon in the very top right corner of your screen as shown below. Click on this icon.
This is the pop-up that will be displayed on your screen:
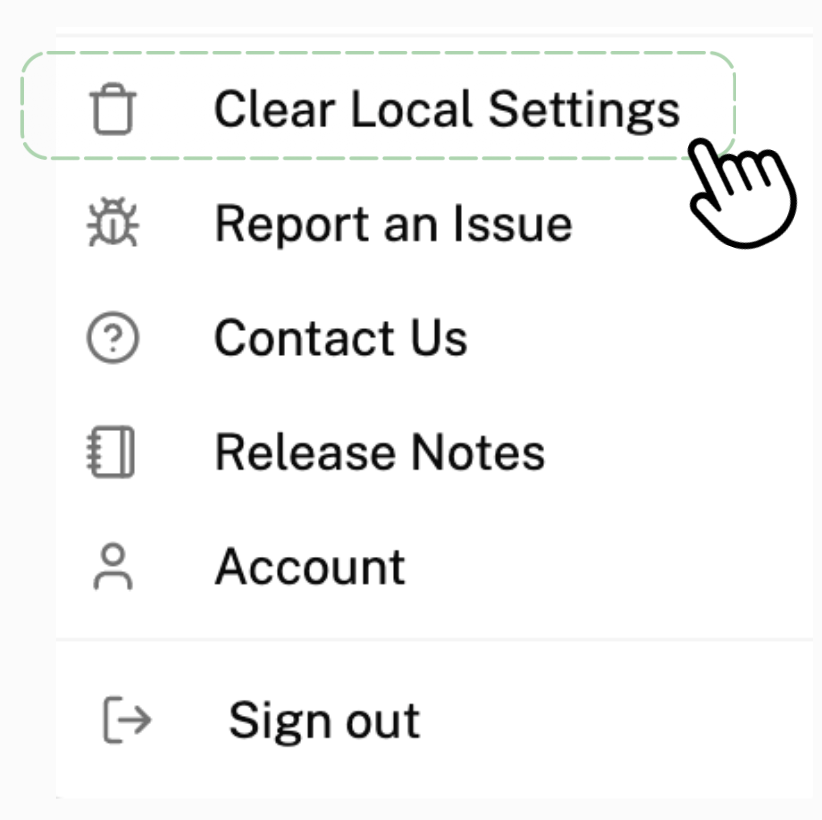
Click on “Clear Local Settings”. This resets and removes all existing filters, amending the issue.